Friday, December 30, 2011

Building the new kitchen wall

Here is the kitchen wall with all the siding removed.

The interior of the kitchen with the ceiling removed shows the original outside porch rafters and ceiling painted yellow.  The unpainted rafters were for the lowering ceiling when the porch was enclosed to enlarge the kitchen.

Putting up bracing before tearing out the wall.

Pretty rotten!


Nathan and Albert tearing out the window frame.

New wall going up, framing in for two windows, 3'x4'.
Below our Noble Fir Christmas tree being planted along the north fence line.
The new exterior wall with the old storm window covering the space for the new windows. 

Our noble fir Christmas tree being planted along the North fence line.

Posted by Picasa

Saturday, December 24, 2011

Christmas Eve Clean-up

The siding is being taken off because some repair is needed on the studs and some of the floor in the laundry room and kitchen also.  Because this was a later addition, the siding does not match the rest of the house and some of it was rotten as well.  Not having enough of the proper siding,  we will be putting up shingles instead, giving some contrast to the kitchen side of the house. 

This was found between the door jamb and the wall stud.  Proof that the kitchen addition  was built in 1948?  Not sure about that, anyone remember?


Here Nathan is using the chute to slide rocks and old brick into the last cribbing hole under the house. 

Albert under the house distributing the debris.

Posted by Picasa

Friday, December 23, 2011

Porch Roof Demolition

Our son Nathan helping Albert sawzalling through the nails to loosen the roof from the house.
.

Albert cutting the roof into pieces managable enough to pull off.

Nathan hooking up the chain from the roof to the tractor.

Backing up slowly.


Just a little more......

Hooray!  No damage to the house at all.


Here they are tipping the piece into the bucket to haul to the burn pile.  First, of course, we will have to pull off the asphalt roofing. 


And pulling of the next section.


All in all, it was done in four sections.  No damage to the little Alberta Spruces either.  I think the house looks bigger now.

Posted by Picasa

Sunday, December 18, 2011

How to Comment

Hi all,

This is Olivia with instructions on how to comment if you don't have a google account.

1. Type your comment - make sure to sign it so we know who you are!

2. Under "Comment as:" choose "Anonymous."

3. Click either "Publish" or "Preview" then "Publish" until it prompts you to answer the security question - you know, "Please enter the letters or numbers you see below" like AbT6ui.

Good luck!

-Olivia

Friday, December 16, 2011

Final day of big equipment

We have brought in pit run to aid in leveling the yard a bit.


Here is  where the septic tank is buried.

South side of the house getting smoothed out with the trak hoe.

We had a shallow ditch put in on the north side of the driveway.  A culvert was also put in under the driveway where it turns to the house so the water will drain downhill.


Above photo is at the north end of the property, more ditch work for drainage.

Those guys and their big equipment do wreck havoc on the flower beds.  I did managed to keep him from running over the peonys, and a spading fork will fix his tracks. 


Final load of gravel and it looks pretty good. 
Posted by Picasa

Tuesday, December 13, 2011

Big Equipment Workday

Albert has finished most of the wooden, old-style drip cap between the house siding and the belly band.  An appropriate term for the boards that go just above the concrete foundation, they wrap around the house like a sturdy belt.  The drip cap does just what it says, catches any water drips that would be coming down the siding and pushes them away from the house.  Nowadays, the drip cap is a metal band, but we wanted the old wooden look and it can be painted the same color as the house.

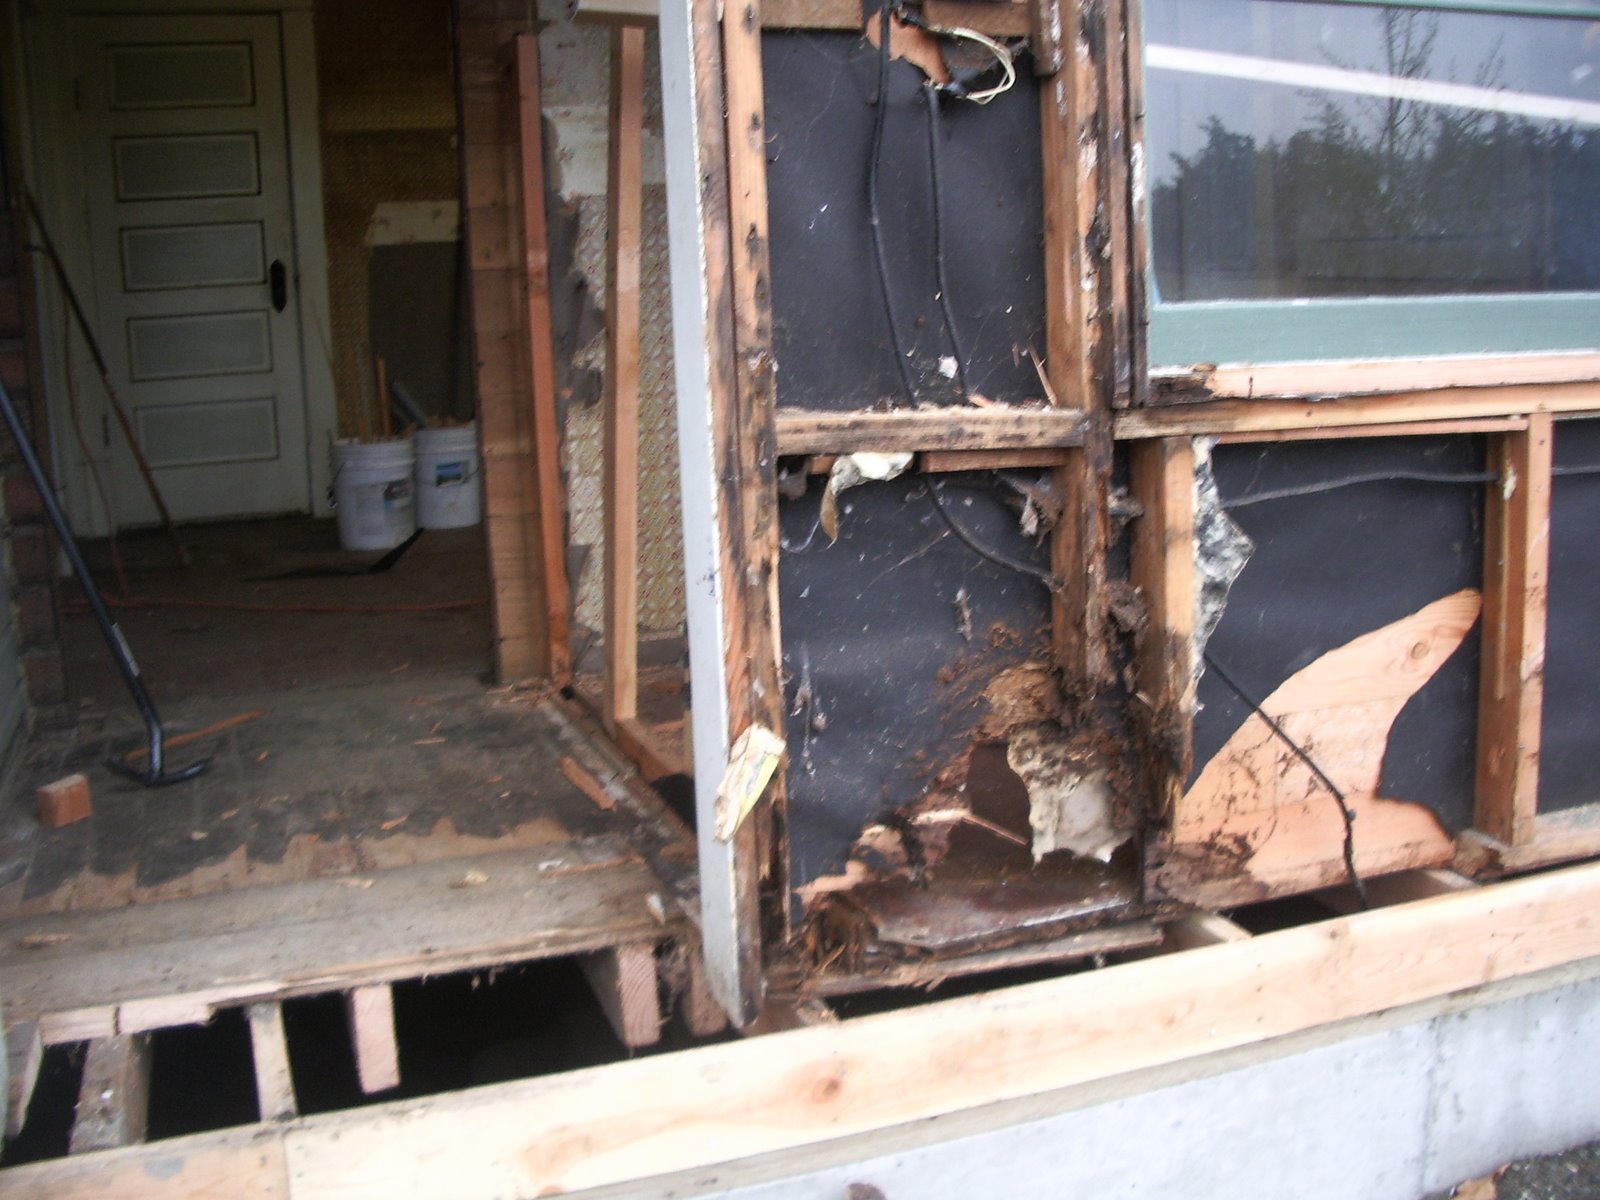
The two parts to the house have a different level of siding.  Here you can see Albert had to rip the siding to measure up to the newer part of the house.

Big equipment needed to dig and then fill in around the house for a french drain.  Lots of water comes down from the east and the drain will catch that ground water and funnel it around the house and out to the west.


While we had the digger here, we uncovered the old septic tank to have it pumped out.  Took us awhile to find the lid. 

Two wooden posts pulled out enabled us to move the concrete lid just enough to get the pumper hose into the tank.


How do you like this!  Even though it is 30 degrees outside, the driver stays warm!

Above photo shows the french drain covered with landscape cloth to ensure no dirt gets into the weep holes of the pipe.  The pipe above it is the regular drain for the downspouts.

Covering up the now empty septic tank.


Below photo is Larry's rake.  He said he uses this sweeper attachment to pick up evergreen needles that fall into his lawn and driveway.  Pretty handy!
Posted by Picasa